Single Sign-On
What is Single Sign-On?
Single Sign-On (SSO) is an authentication method that allows users to log in to multiple applications with a single login. With SSO, you don’t have to remember multiple usernames and passwords, which simplifies the login process and improves security.
Once you are logged in via SSO, you gain access to all connected services without having to log in again. We offer SSO integration with Microsoft 365, so you can use your existing Microsoft account from your employer for a seamless and secure experience across our services.
How to Get Started
To use SSO with us, your company’s Microsoft 365 administrator must first approve it.
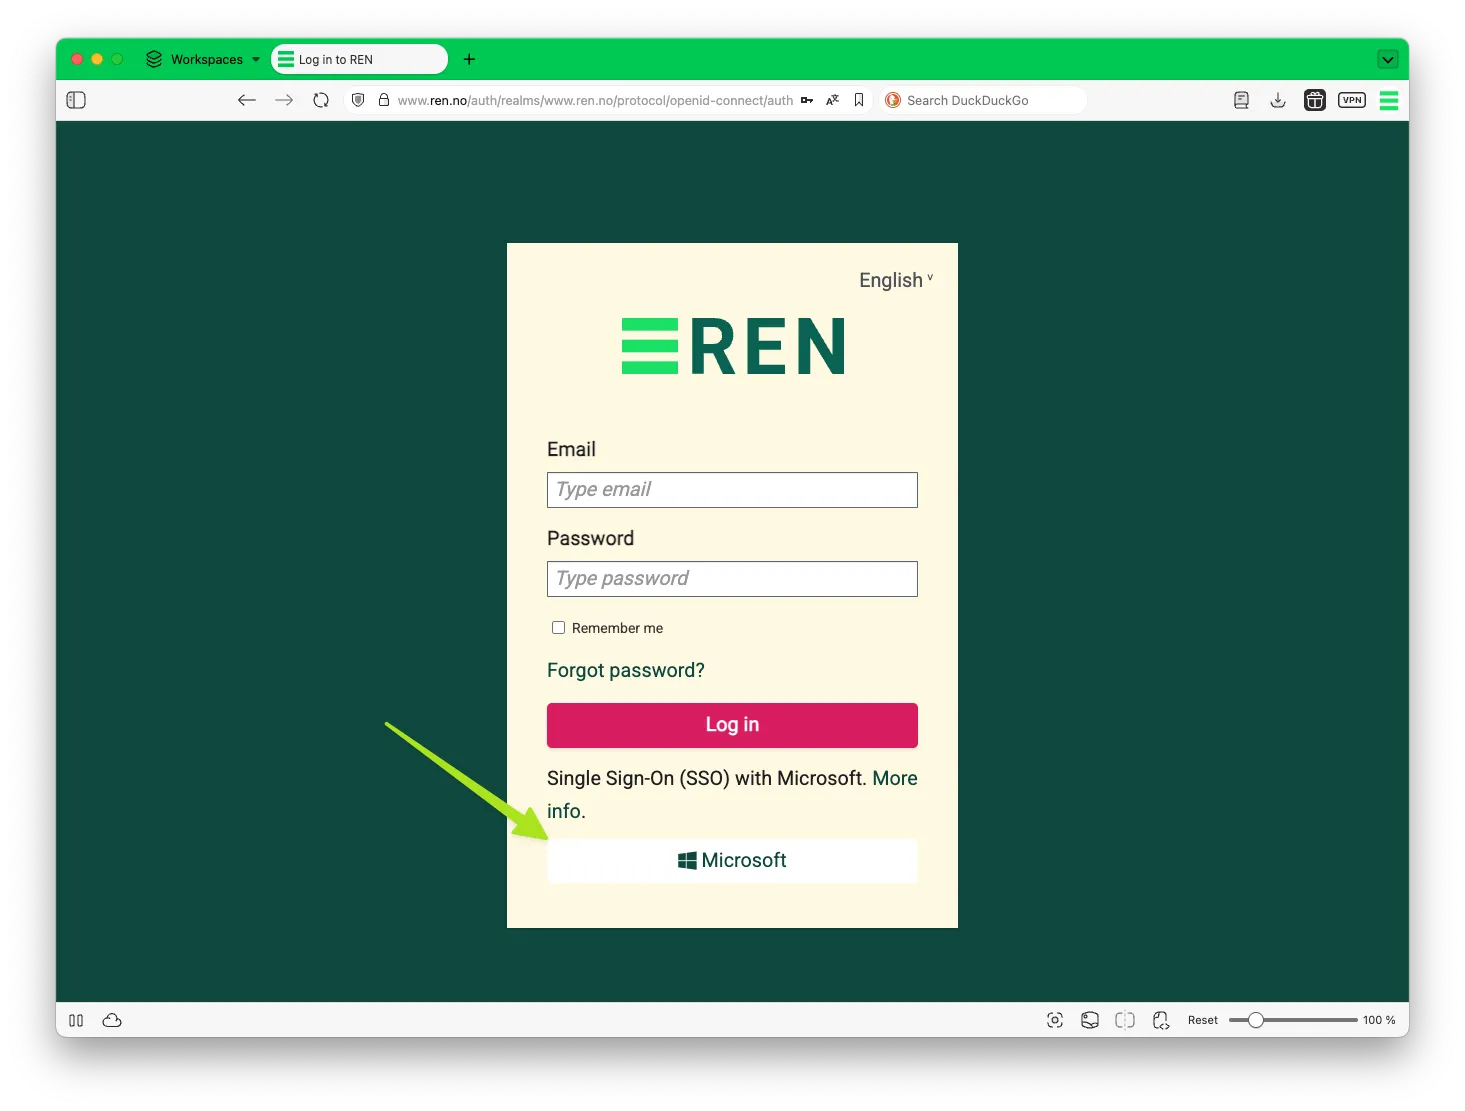
Once that is done, you simply click the Microsoft button in the login window.
Automatic Creation of a User Account
If your company has a subscription with us but you do not yet have a user account, you can create one yourself using the SSO solution. Just click the Microsoft button in the login window and follow the steps.
The account will be created automatically with your name, email address, and company affiliation, in line with your Microsoft 365 account.
To automatically create your user account, your employer has to activate this with REN/Groft first.
My REN Username Is Not the Same as My Microsoft 365 Account
If you used an email alias or a different email address than your primary Microsoft 365 account when you created your REN user account, single sign-on will not work with your existing REN account.
In that case, you must change your email address used under User Settings on My Page so that it matches your Microsoft 365 account.
Single Sign-On for Administrators
The SSO solution we offer involves several components: Keycloak, our Customer system, Wildy, REN’s Azure, and the customer’s Azure. REN naturally does not control the customer’s Azure environment. For the customer’s users to be able to log in to our websites using SSO, the customer’s Microsoft 365 administrator must configure the customer’s Azure.
REN’s requirements
In order to use Microsoft for SSO with REN, REN must be granted access to certain user data from Microsoft. Only an administrator at the user’s company can grant this access.
REN needs to be able to:
- Read the user’s email address – to link the user to a user account in our systems
- Read the user’s name – to automatically create the user when the user’s employer has agreed to this with REN/Groft
- Check whether the user has enabled two-factor authentication (MFA) – so the user does not need to use two-factor authentication with REN if it is already enabled with Microsoft
- Store this information in our systems – so the user can be recognized on future visits
Configuration Options
Single-Tenant Customer – Simplest
The simplest setup for an administrator is to follow this link:
https://login.microsoftonline.com/organizations/adminconsent?redirect_uri=https://www.ren.no/sso-admin&state=1&client_id={Client_ID}where Client_ID is the Application ID from the app in REN’s Azure.
Example:
https://login.microsoftonline.com/organizations/adminconsent?redirect_uri=https://www.ren.no/sso-admin&state=1&client_id=644629f0-8862-4f81-973b-0437bb3f92e2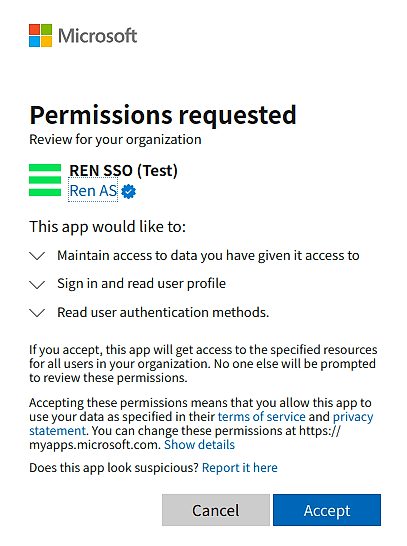
When an administrator follows the link, they will first go through the standard Microsoft login flow. After that, a consent screen is shown where the administrator approves that REN can read user data.
Multi-Tenant Customer
If the customer has multiple tenants, this approval will apply to the tenant that is the default for the current administrator. If this is not the correct one, “organizations” in the URL above must be replaced with the ID of the correct tenant. The URL then becomes:
https://login.microsoftonline.com/{Customer_Tenant_ID}/adminconsent?redirect_uri=https://www.ren.no/sso-admin&state=1&client_id={Client_ID}Apart from this, the flow is identical to the one described above.
Approval Required
If the steps above are not completed, users who access the application will be presented with a dialog box prompting them to provide a justification for why they are requesting this access.
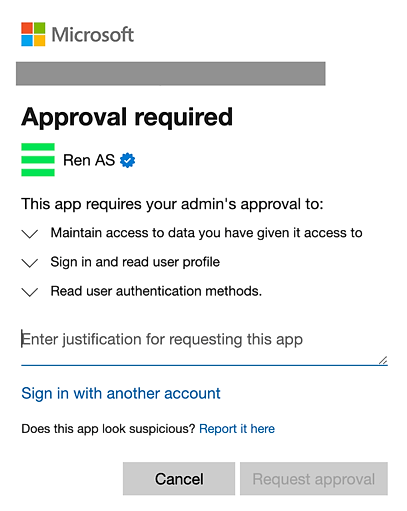
This will result in an email being sent to the administrator, who can then follow a process similar to the ones described above. It is important to remember that all of this takes place during the Microsoft login process.